
One of the many stoner stigmas to debunk immediately is our lack of hygiene and cleanliness. Imagine every movie you’ve seen involving a room full of smoke from taking a bunch of bong rips - it is probably not the cleanest and has stuff thrown all over like we are careless and couch locked all day long. On the contrary, there are more productive stoners than our community is given credit for. And maintaining smoking accessories is a task in itself and we deserve credit where it’s due! In all seriousness, learning how to clean a dab rig properly and efficiently is one of the best things a dab enthusiast can learn to keep the quality of their smoking accessories and experience the goodness in each dab hit. There are some extra tools you can pick up from our store online to help you out with the more difficult parts of the process, but once you get a cleaning routine that works for you there will be nothing stopping you from having a clean dab rig 24/7 feeling like you just got a new piece of hardware every single time. Cleaning dab rigs doesn’t have to be hard, you just have to know what you’re doing so here’s all you need to know about how to perform a proper dab rig cleaning. Here’s a hint: pick up some dab rig cleaning solutions to make the job just a bit easier on you.
Why is cleaning my dab rig important?
Besides hygiene being a main factor in why cleaning a dab rig is so important, there are so many other legitimate reasons to regularly maintain a clean dab rig at all times. Imagine if you didn’t maintain your car or house when you are supposed to: things might continue to function properly on the surface, but at some point issues will start to build up and can cause some serious damage in the long run. There can be a lot of built up resin that accumulates with every dab rig session, and the more it builds up the harder it can become to remove. It is possible that some dab rigs have a self-cleaning function, but sometimes it is best to physically clean every part of the device so you know exactly how to clean a dab rig on your own. Like a carwash, self-cleaning features are nice to have, luxurious to experience and easier than getting your own hands dirty - there is nothing like getting the job done yourself and putting some elbow grease into your work.
Cleaning dab rigs helps with health and maximizes efficiency
Have you ever taken a dab hit and experienced a clogged device? It’s not fun nor does it taste good, and to avoid the hot mess express of a dirty and clogged dab rig, smoking accessories should be continuously cleaned and inspected. The quality of dab hits are exponentially better and incomparable to those taken from dirty dab rigs simply due to the lack of old resin and built up contaminants that start to appear over time. If you are looking for high quality dab hits, sometimes it’s not about the expensive device and more so about the upkeep of any dab rig accessory. Let’s put it this way: if you can’t be responsible enough to clean one of our budget-friendly dab rigs, what makes you think you can handle the high-end options? Try to be honest with yourself and understand that while we make smoking accessories highly affordable, try not to buy an expensive dab rig with the intention to take care of it but do not follow through. If you are that person (no shame in your game), try out one of our dab rigs under $50 to see how well you can take care of a dab rig before diving into the deep end for a heady piece.
Dab hits from a clean dab rig will also lower the chances of any health risks that can occur when inhaling resin or bacteria that might build up in a dirty bong or dab rig. Whether it is old water that continues to sit sesh after sesh, or the little bits of concentrate that and resin that start to creep inside of those crafty little corners that are hard to clean as is. No matter what situation your dab rig is making you deal with, just know that cleaning dab rigs will go so much smoother if taken care of in a routine manner. A clean dab rig makes for a happy dabber, and you’ll thank yourself later on for paying attention to your stoner space as it will pay off in high quality dab hits.
What’ll you need to clean your dab rig?
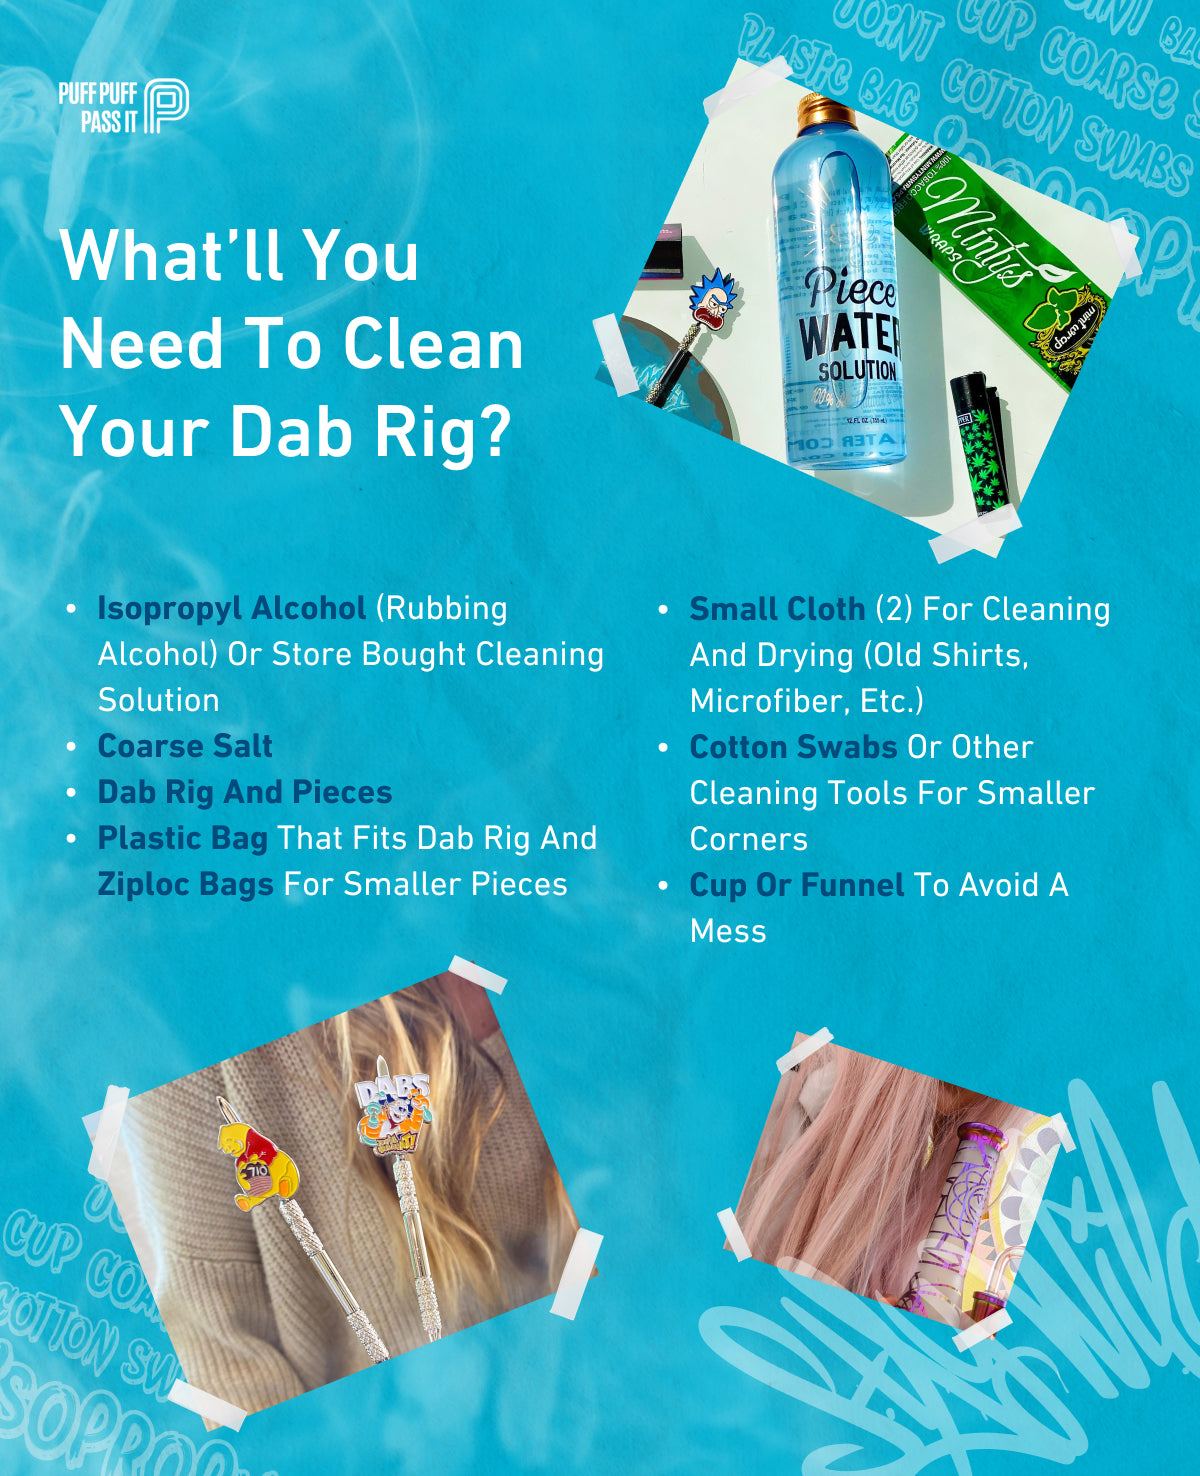
If you already have some of these supplies laying around the house, more power to you and are already well on your way to properly learning how to clean a dab rig. For those that do not have any or all of the following supplies, don’t worry you can always visit our storefront for cleaning solutions and dab rig cleaning tools that will make the job that much easier. Here is a list of what you generally need to ensure a good dab rig cleaning:
- Isopropyl alcohol (rubbing alcohol) or store bought cleaning solution
- Coarse salt
- Dab rig and pieces
- Plastic bag that fits dab rig and ziploc bags for smaller pieces
- Small cloth (2) for cleaning and drying (old shirts, microfiber, etc.)
- Cotton swabs or other cleaning tools for smaller corners
- Cup or funnel to avoid a mess
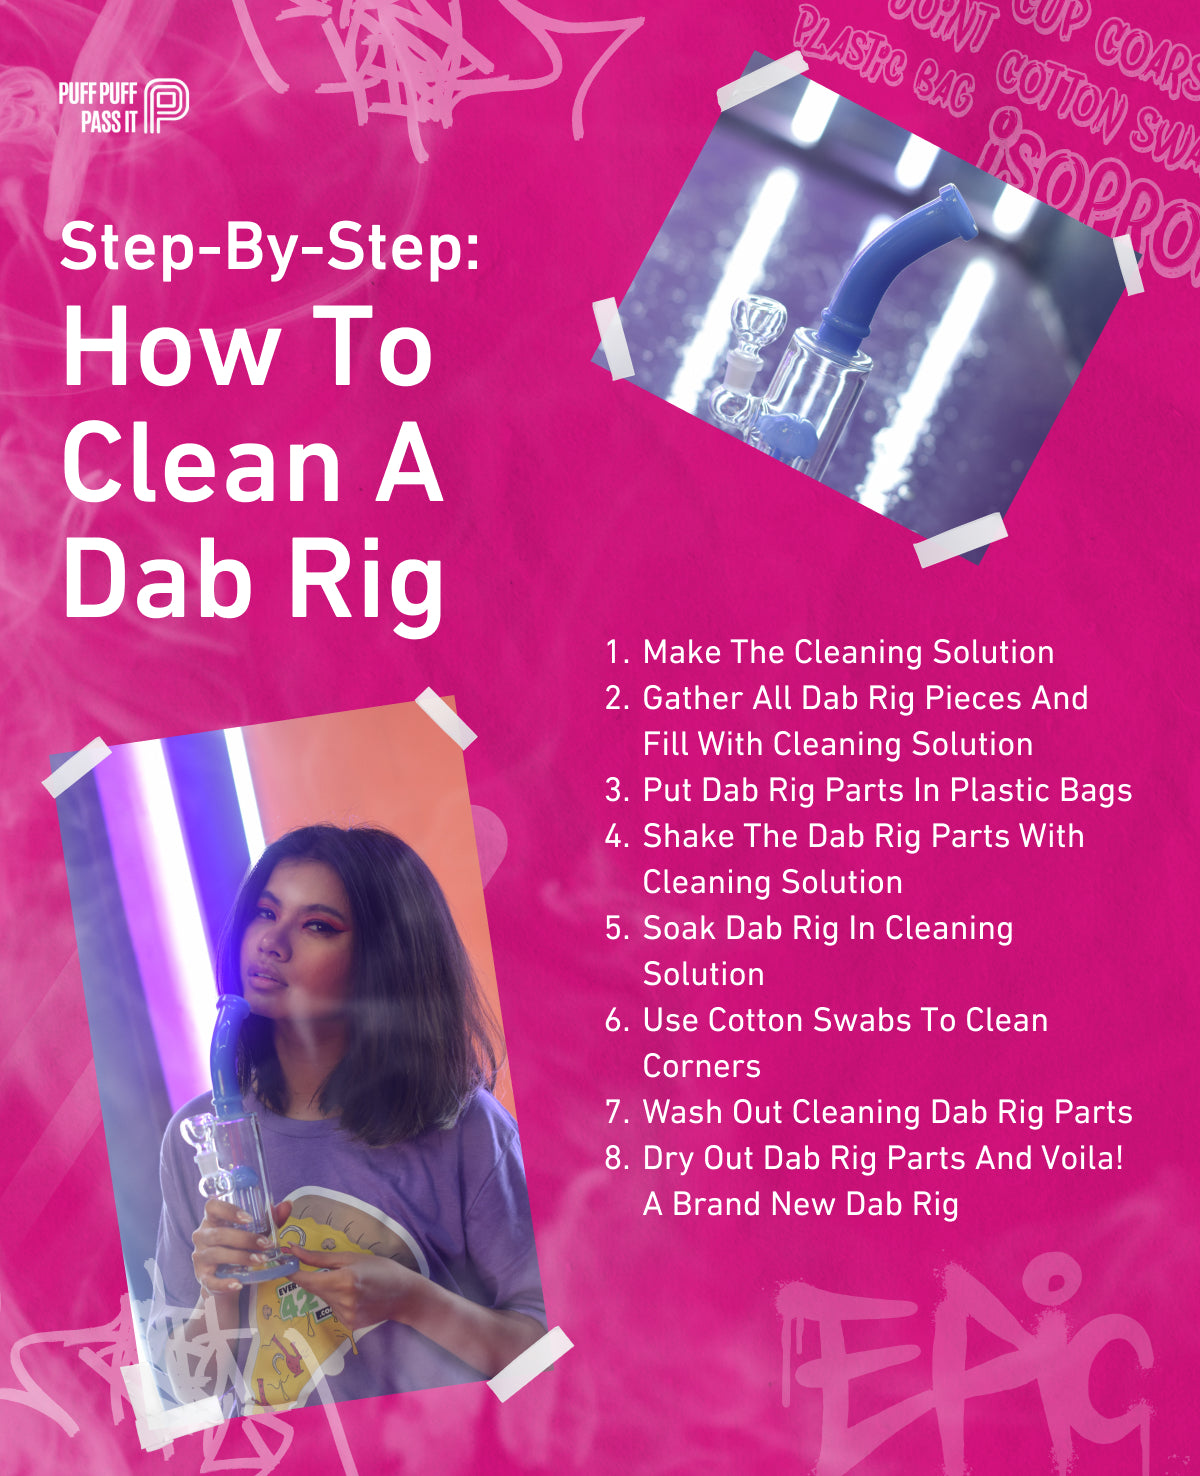
How to clean a dab rig (step-by-step guide)
1. Make the cleaning solution
Now that all of the necessary tools are gathered and prepared to be used, it’s time to create the cleaning solution that will be used for your dab rig cleaning. If you don’t choose to buy a commercial cleaning solution from our store online, you can always use isopropyl alcohol, or rubbing alcohol as an alternative. By mixing at least 16 ounces of isopropyl alcohol and coarse salt, this homemade cleaning solution will get the job done as well as any store bought options. If there are other types of salt on hand that are coarse and will help with the scrubbing part of the cleaning process, feel free to use that as well. The point of utilizing whatever salt you have on hand is to limit the act of buying an unnecessary amount of supplies, as long as it is coarse and able to be used as a scrubbing agent it will work just fine.
2. Gather all dab rig pieces and fill with cleaning solution
This step will be much easier if you have all dab rig pieces separated and ready to be cleaned, so if you have not already done so make sure all pieces are unscrewed and taken apart so that the cleaning solution can reach every area it needs to. Removing the dab nail and any other attachments that can come apart from the main body of the dab rig is ideal, including any glass attachments to an electronic base.
Next, take the cleaning solution and start to fill every single part of the dab rig ro as much as possible and evenly throughout.
3. Put dab rig parts in plastic bags
Covering the dab rig parts with a cleaning solution is an important step to take because isopropyl alcohol can evaporate pretty quickly and the only way to prevent this is by covering all attachment pieces. Plastic bags are a budget-friendly, easy solution that most people already have on hand in their household, so use as many plastic bags that are needed to make sure all soaked pieces are thoroughly covered. If you are unsure of what is the best way to cover your pieces, do not overthink this step and just make sure the pieces are covered and not exposed to air. If using a container instead of a plastic bag, putting a sealed lid on will do a fabulous job at keeping in the isopropyl alcohol solution.
4. Shake the dab rig parts with cleaning solution
After securing and making sure all dab rig parts are covered in cleaning solution and bagged up properly, the fun part is here where you have to shake it all up and let it do its job! When the cleaning solution mixture of isopropyl alcohol and coarse salt are shaken together, the cleaning solution will start to activate and do what it’s meant to do. This means that the isopropyl rubbing alcohol will loosen up the gunk and resin, while the coarse salt will scrub debris off in especially hard to reach places. Shaking back and forth for at least a minute should guarantee that the cleaning solution mixture was equally distributed, but if you ever see that there are some stubborn spots that just won’t budge, feel free to continue shaking for as long as you need to.
5. Soak dab rig in cleaning solution
This is pretty straight forward, but when it comes time to let the dab rig soak in the cleaning solution, you’ll want to make sure that each piece is properly placed down and the solution is able to be distributed evenly throughout. Soaking each piece in a cleaning solution will help the mixture penetrate the gunk and leftover debris making it that much easier to remove later on with just a quick wash!
6. Use cotton swabs to clean corners
After a good soak, the more difficult parts to clean will become a little bit easier and with the help of cotton swabs and other smaller tools - the job will get done! Cotton swabs or dab tools specifically made for cleaning can really be a game changer in making your hardware look brand spanking new. The hard to reach places in a dab rig are no joke, and luckily you won’t need to figure it out on your own with this little trick of soaking your glass first. Rookies tend to make the mistake of rushing the cleaning solution but once you allow it to do its thing, the hard work is pretty much taken care of.
7. Wash out cleaning dab rig parts
Upon soaking and using cotton swabs to clean out the nooks and crannies, now is time to wash out the cleaning solution to reveal the results! Using warm water, this ensures that no glass damage will be done by cold water or hot water as this can easily happen and cause cracks and make it more susceptible to breakage.
It is best to inspect all glass hardware to make sure no pieces are cracked or have been mishandled, as this can directly affect the quality and overall experience of a dab rig. Also, it is essential that all of the cleaning solution is properly washed away because no one wants to be inhaling isopropyl alcohol and salt.
8. Dry out dab rig parts and voila! A brand new dab rig
It will take some time for the interior part of dab rigs to dry, but the exterior can be wiped away and handled with a microfiber cloth. Using paper towels or other cleaning wipes that can be found around the house can actually cause damage to a dab rig, so it is best to use a microfiber cloth to avoid causing any unwanted scratches.
Is sterilizing a dab necessary?
Sterilizing a dab is not necessary to do every single time, but it is best to always keep in mind that there should be a routine dab rig cleaning schedule to avoid any continuous build up and potential bacteria that can accrue over time. It is so important to make sure that you are correctly cleaning dab rigs so that each dab rig can properly function - if you wait too long and use a dab rig too many times, the clean up that is inevitable will be more of a nightmare the longer you wait.
If you want, using the torch can be a fast and efficient way to quickly sterilize the entire dab rig device. By burning off the buildup it is much easier to clean later on, but be careful about overheating smaller corners as they are joints that hold the piece together and it is best to use a dab rig cleaning solution for those specific areas.
How often should I be cleaning my dab rig?
Depending on how much a dab rig is used is how often it should be cleaned. If someone is a novice user with their dab rig and only busts it out once in a blue moon, it is safe to say that a quick cleaning right after will take only a few moments and there really won’t be much to clean up. But if you are an avid dabbing enthusiast and use dab rigs multiple times a day, it is highly suggested that you perform a dab rig cleaning weekly or every other week. To avoid having to work harder during the cleaning process, cleaning the dab nail every time after use is a quick way to keep a dab rig in tip top shape without having to overdo it with a full cycle clean.
How do you get wax out of a dab rig?
If you’ve never heard of reclaim dabs, it is when users are referring to the re-condensed wax concentrate that gets left behind in the dab rig after a dab session. The built up resin is said to be pretty potent and can be re-smoked, and it is essential to get the reclaim buildup out after a few sessions as too much can clog a dab rig and change the taste and effect of a dab hit. Reclaim can either be resmoked, eaten, or infused into an edible treat. Whether you choose to reuse the reclaim in a dab rig or clean it out and dispose of the re-condensed concentrate, paying attention to the buildup and how often you perform a dab rig cleaning will help extend the longevity of dab rig devices to deliver high quality dab hits. A dirty dab rig could never!
Other dab rig cleaning methods
There are many dab rig cleaning solutions besides isopropyl alcohol and other options we have available on our online website, so feel free to get creative in your cleaning methods and use what you have on hand to get the job done. Here are a few ideas that you can try that are just as effective as the typical dab rig cleaning methods:
Dab rig cleaning with hot water
Sometimes you won’t have everything you typically use to clean a dab rig and that’s okay, there’s no need to run out to the store if there’s truly no need. You can always clean a dab rig with hot water from your stove by boiling it and letting the steam build up. Holding the dab rig over the steam will help separate the resin and build up from the glass pieces, and before the water gets warm the next step is to pour the hot boiling water into the dab rig to flush out the resin that was loosened up by the steam. It is best to cover the open holes of the dab rig (mouthpiece and nail banger insert) and give it a good shake so the hot water can move freely through the dab rig to ensure a good cleaning.
Dab rig cleaning with baking soda and vinegar
Other household items you can use to clean a dab rig are baking soda and vinegar, two great cleaning agents that when combined produce a powerful paste that can remove the most difficult buildups in dab rigs. While working with baking soda and vinegar won’t smell the best, it does just as great of a job as isopropyl alcohol and coarse salt.
Dab rigs online at Puff Puff Pass It
Looking to expand your dab rig collection? You’ve come to the right place, and if you need help choosing (we have so many and know how hard it can be!) you can always contact us and we are happy to assist. If you want to learn more about us and our Puff Puff Pass It story, we have story times for days and have so many exciting things in the works. Stay tuned and keep your dab rigs clean in the meantime!